
Cleaning a twin-screw puffing extruder is critical for maintaining product quality, preventing cross-contamination, and extending the life of expensive components like screws and barrels . This guide provides a comprehensive, step-by-step approach to cleaning your extruder after production.

1. Preparation and Safety First
Before you begin handling any parts, proper preparation ensures the process is safe and effective.

- Lockout/Tagout (LOTO): Ensure the extruder is completely shut down and disconnected from its power source. Lock the main switch and hang a warning sign to prevent accidental startup .
- Cool Down: Allow the machine to cool to a safe temperature (ideally below 50°C or 122°F) to prevent severe burns. If you must work on it while warm, wear appropriate heat-resistant gloves .
- Gather Supplies: Collect all necessary tools and cleaning agents. This typically includes:
- Personal Protective Equipment (PPE): Heat-resistant gloves, safety glasses, and protective clothing .
- Cleaning agents: Purge compound, cornmeal, rice flour, or food-grade cleaning solutions .
- Tools: Brass brushes, scrapers (non-abrasive, like copper or brass), cleaning cloths, compressed air, and wrenches for disassembly .
- Depressurize: Open the die or venting ports to ensure any remaining pressure within the barrel is safely released .
2. Initial Purge (The First Wash)
Before disassembling the machine, you should push out the bulk of the residual material from the inside.
- Run a Purge Material: Introduce a cleaning or purge material into the hopper. Common choices include cornmeal, rice flour, or a commercial purge compound, especially if you are switching between different types of products .
- Operate the Extruder: Run the extruder at a low screw speed. This soft material will push the remaining product out of the barrel and through the die. Continue until the discharge runs clean and shows no signs of the previous product .
3. Disassembly for Deep Cleaning
Once the machine is purged and cool enough to touch, you can begin taking it apart for a thorough cleaning.
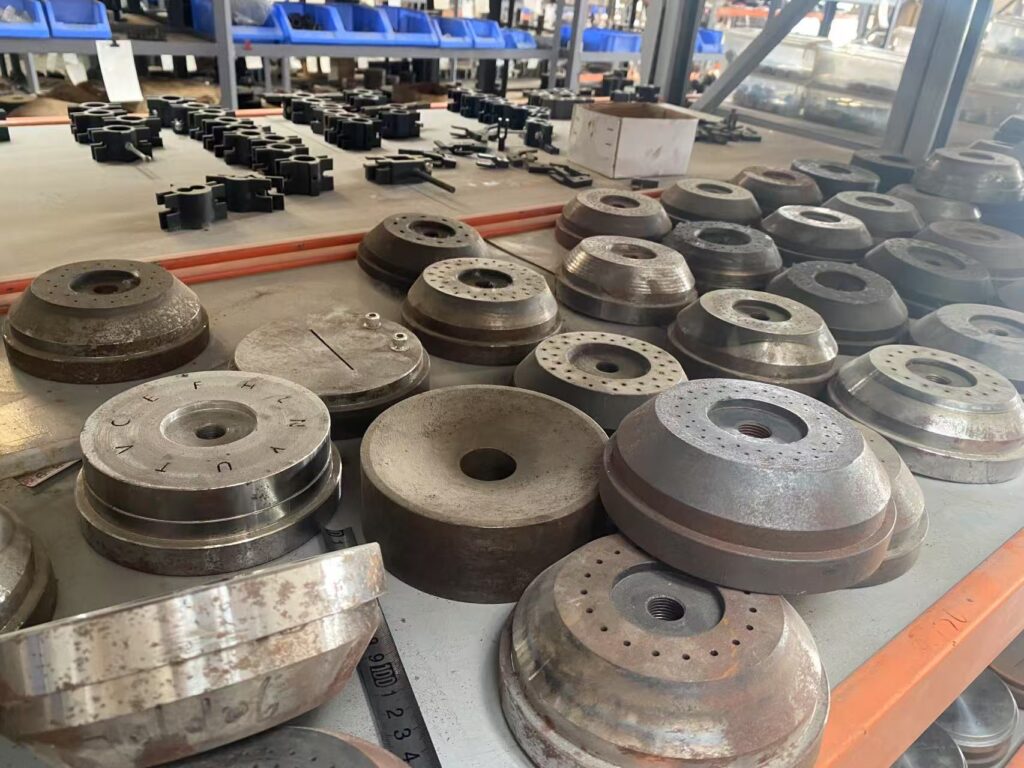
- Remove the Die and Cutter: Carefully detach the die plate and cutter assembly. These parts often have complex geometries where material can get stuck and should be cleaned immediately . It is often best to clean them while they are still warm .
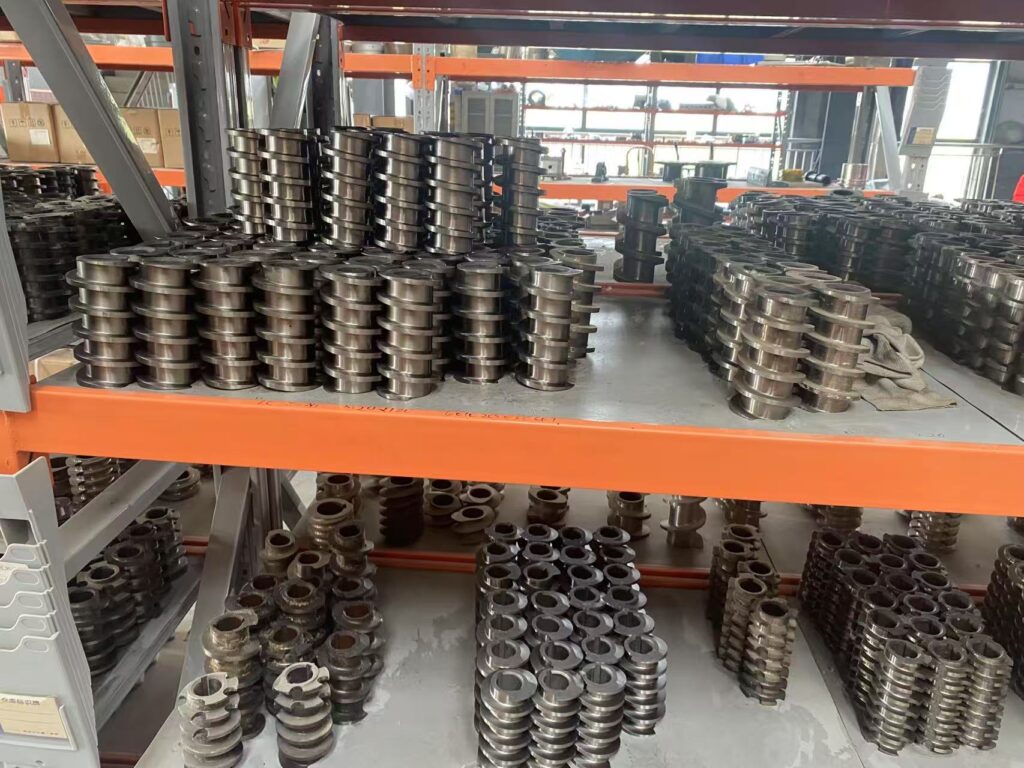
- Extract the Screws: Open the barrel and carefully remove the twin screws. This may require specific tools and a lifting device for heavier screws. Be extremely careful not to nick, scratch, or bend them during removal .
- Remove Auxiliary Parts: Detach other removable components such as the feed hopper, seals, and any sensors to clean them separately .
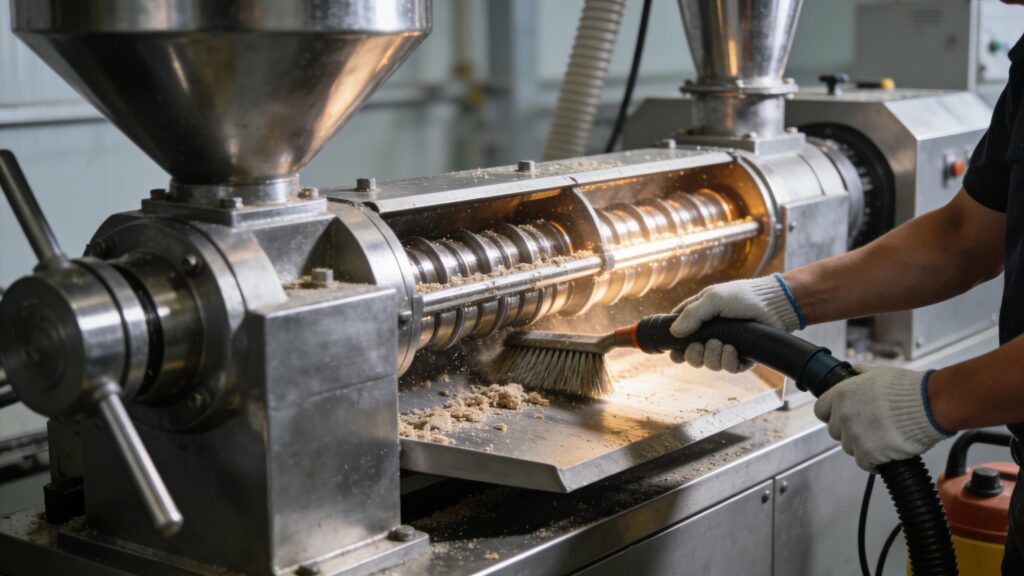
4. Cleaning the Components
This is the most labor-intensive part of the process. The goal is to remove every trace of residue without damaging the metal surfaces.
| Component | Cleaning Method | Critical Notes |
|---|---|---|
| Screws | Soak or spray with food-grade cleaner; scrub with a brass brush to remove residue; rinse and dry completely . | Never use steel tools or wire brushes, as they will scratch the screw surface, leading to future material buildup and corrosion . |
| Die & Cutter | Soak in cleaning solution; use precision tools to clear holes; rinse and dry thoroughly . | Do not damage the surface finish of the flow channels. |
| البرميل | Wipe interior with cloth/brush; blow out holes with compressed air; inspect for wear . | Pay special attention to areas where material can accumulate, such as kneading blocks and heater gaps . |
| Barrel & Frame | Wipe down exterior, control panel, and frame to remove dust, grease, and spills . | Also, clean auxiliary equipment like feeders and conveyors to prevent external contamination . |
5. Reassembly and Final Checks
Once everything is clean, dry, and inspected, you can put the machine back together.
- Inspect for Wear: Before reassembling, this is the perfect time to check screws, barrel liners, and dies for signs of wear or damage. Replace any worn parts now to avoid issues later .
- Reassemble Carefully: Reinstall the screws, ensuring they are properly seated in the barrel. Reattach the die, cutter, and all other components. Follow the manufacturer’s torque specifications for all bolts .
- Lubricate: Apply food-grade lubricants to any moving parts or bearings as specified in your maintenance manual .
- Run a Test Cycle: Before starting full production, run the machine with a small amount of purge material or water to ensure everything is functioning correctly and no cleaning residues remain .
- Document: Record the cleaning in a logbook. Note the date, time, and any issues found. This helps maintain a consistent schedule and is often required for food safety compliance .
By following this systematic procedure, you ensure that your twin-screw puffing extruder remains in top condition, producing high-quality products run after run. If you are interested in the double screw extruder machine , you can contact me , i will give you good advice and solutions .
1.Will you help us with the installation ?
Yes , We will send engineers to install and debug the equipment, and assist in training your staff.
2.Are you a factory or trading company?
We are a factory.
3.What certificate do you have?
We have ISO and CE certificate.
4.How long is the warranty period?
All of our machines have one year warranty.
5.What’s the main market of your company?
Our customers all over the world.
6.How much production capacity of your company one year?
This depends on your needs.